
STEP ONE: Install VS Code
- Download either the 32-bit or 64-bit Windows User Installer version of Visual Studio Code (VS Code) from the link https://code.visualstudio.com/download . To know if you have 32- or 64-bit,
- Right click on This PC in Windows File Explorer and go to Properties.
- On the “System” type line, it should say either 64-bit Operating System or 32-bit Operating System.
- Once you click on the correct download link, it will take you to the VS Code “Getting Started” page, and a download of the executable file should automatically begin.
- Run the executable (double click on it from your downloads folder) to install VS Code, and check “I accept the agreement” and click Next button
- Select the location in your computer to install VS Code (you can leave it to the default if you want) and click Next button
- Check ALL the check boxes in the “Select Additional Tasks” screen:
- Create Desktop Icon
- Add “Open with Code” action to Windows Explorer file context menu
- Add “Open with Code” action to Windows Explorer directory context menu
- Register Code as an editor for supported file types
- Add to PATH
- Then, click Next button in the “Select Additional Tasks” screen.
- Click Install button to start installation.
- After completion of setup, click Finish button to finish installation of VS Code.
- If you select the “Launch Visual Studio Code” check box in step 7 above then it directly launches VS Code initially. Otherwise, you can launch VS Code by clicking the Desktop VS code icon.
STEP TWO: Install C++ Extension to VS Code
- Click on the Extensions button in VS Code. It is in the menu on the left side (see image below).
Then, type “C++” in the search bar (see image below) and hit the Enter key on your keyboard to display all extensions related to C++.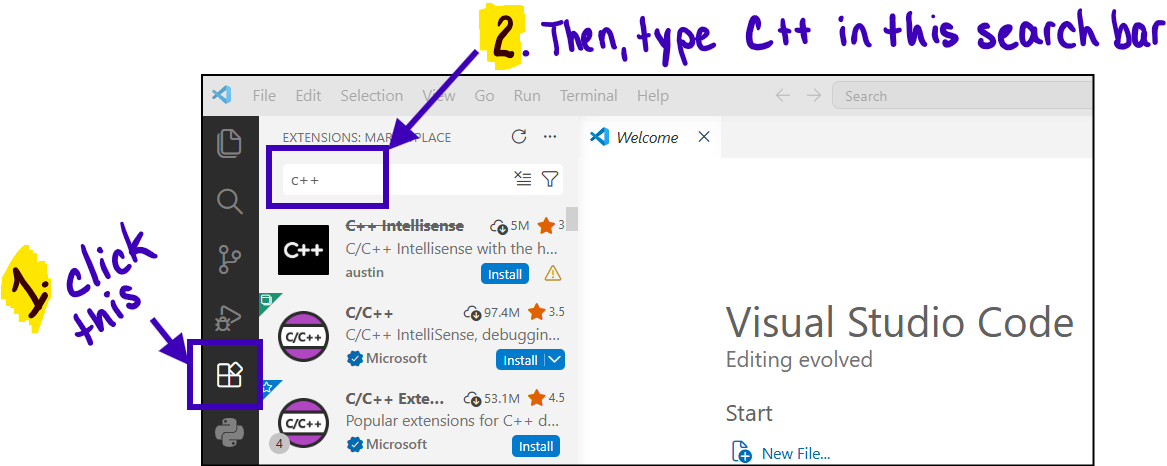
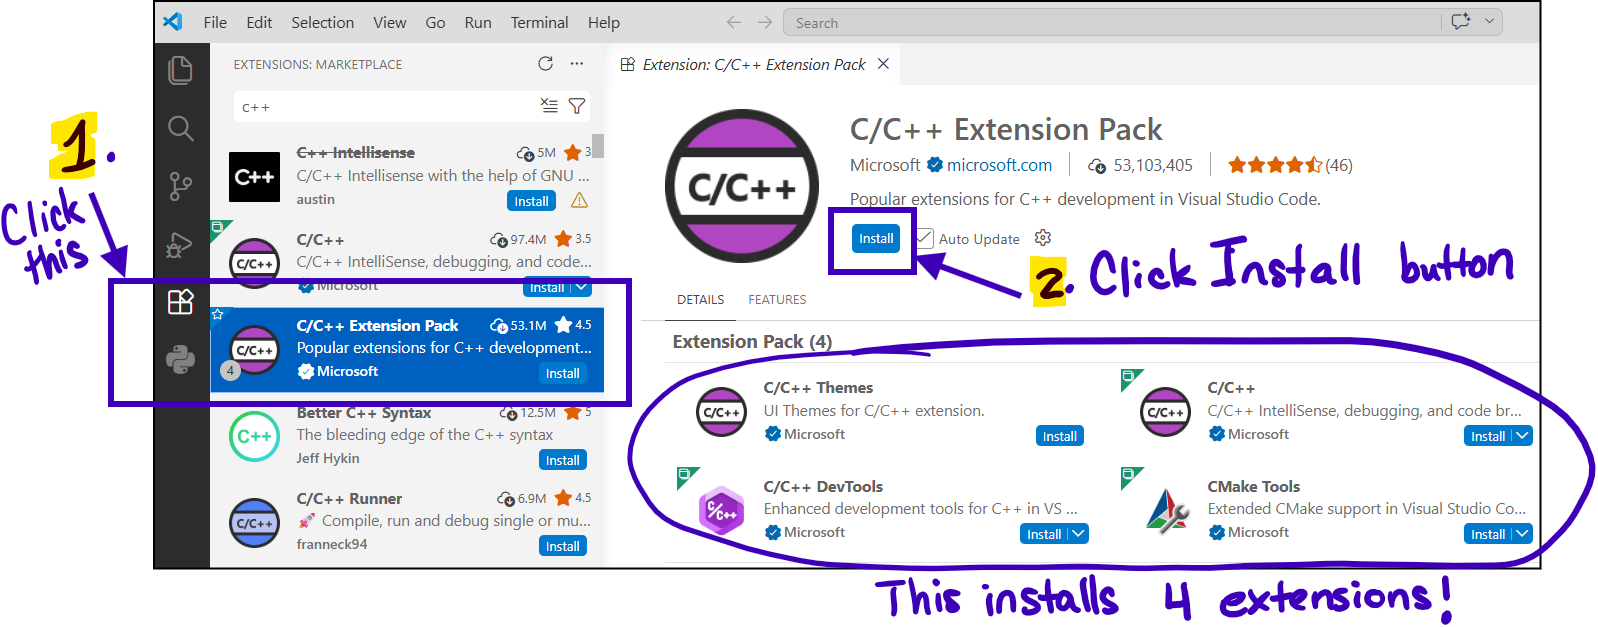
- Then, click on the C/C++ Extension Pack Microsoft extension and click the Install button. This extension will install four extensions at one time.
- Last, close VS Code and re-open it. Many times, extensions do not install or uninstall fully until you have rebooted VS Code.

