
STEP ONE: Install VS Code
- Download Visual Studio Code (VS Code) version that matches your Linux platform from https://code.visualstudio.com/download.
For this tutorial, we downloaded .deb as our machine uses Ubuntu Linux platform. - To install VS Code:
- Open a terminal (
Ctrl + alt + T) - Navigate to the folder where you have downloaded the VS Code file. For this tutorial, the installation file of VS Code downloaded to Downloads folder. So, we change the directory to it by following command:
$ cd Downloads - Install VS Code by typing following command:
$sudo dpkg -i code_1.45.1-1589445302_amd64.deb
Where ‘code_1.45.1-1589445302_amd64.deb’ is the name of downloaded VS Code file.
- Open a terminal (
- To launch VS Code, open the dash and type ‘Visual Studio Code’ and click VS code icon.
STEP TWO: Install C++ Extension to VS Code
- Click on the Extensions button in VS Code. It is in the menu on the left side (see image below).
Then, type “C++” in the search bar (see image below) and hit the Enter key on your keyboard to display all extensions related to C++.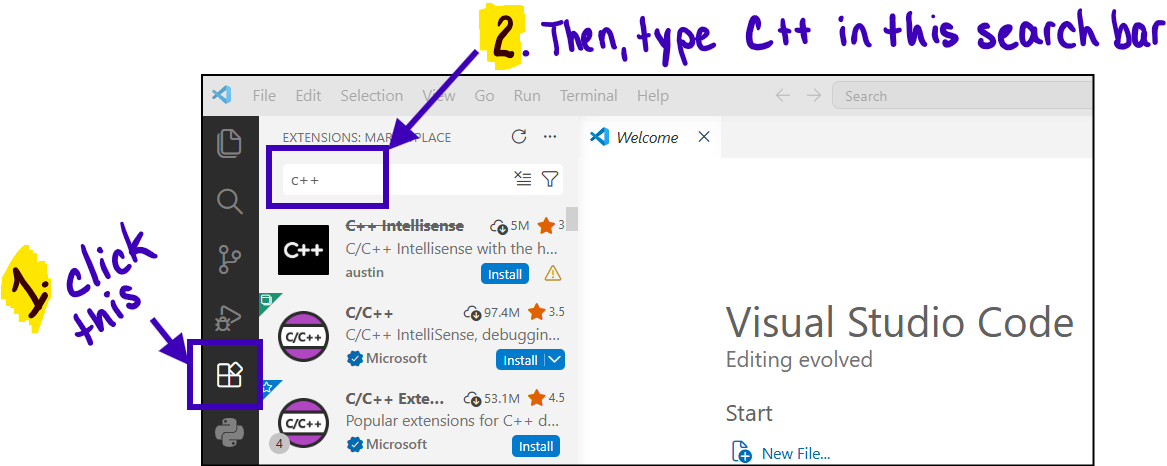
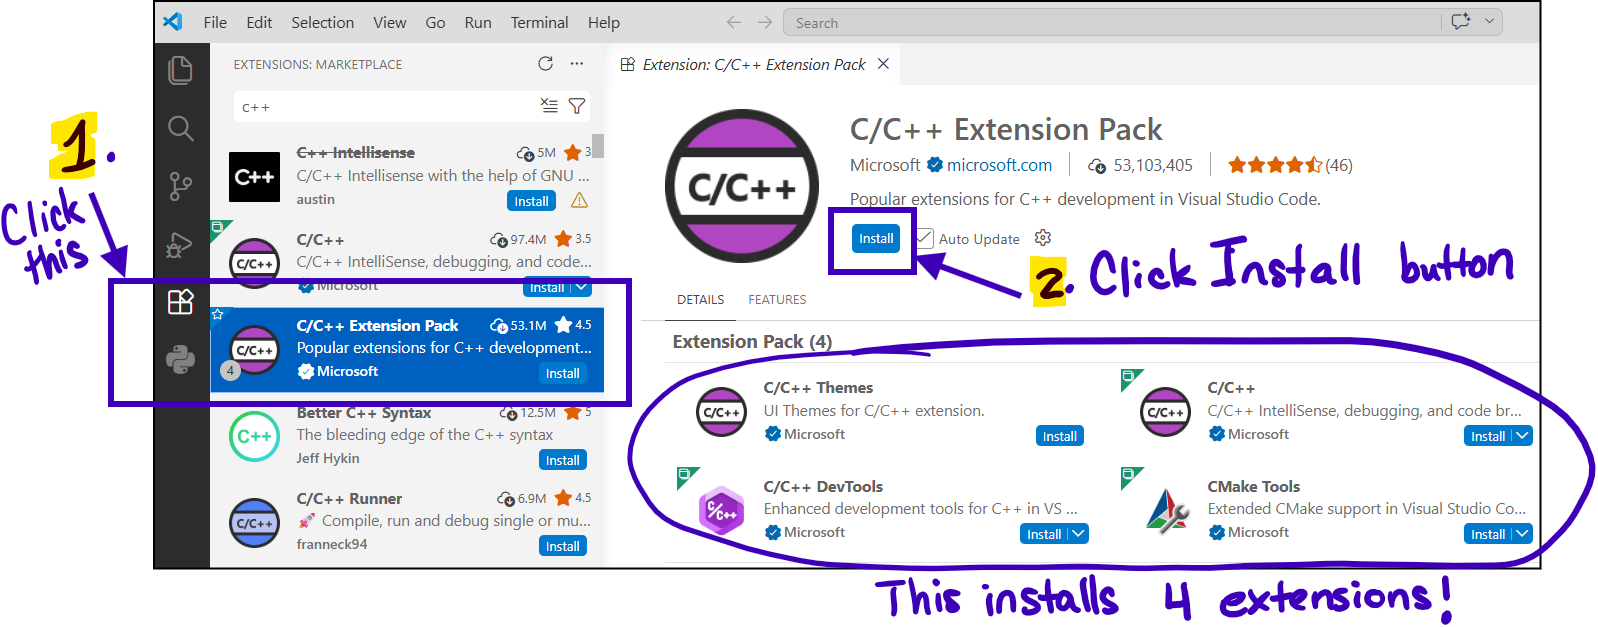
- Then, click on the C/C++ Extension Pack Microsoft extension and click the Install button. This extension will install four extensions at one time.
